Trials & Tribulations of Running a Small Business

Monday, April 13, 2009

Marshmallows - why not?


Marshmallows are sticky, sweet and just plain ridiculous. But they're also fun to make and eat, so here's our bakery marshmallow recipe.

You will need a candy thermometer, a brownie pan (9" x 13"), and a kitchenaid mixer with a whisk. If you want to flavor your marshmallows, you can either add an extract at the end of mixing (with some food coloring if you choose) or you can substitute 1/2 or less of the water that the gelatin blooms in with another liquid (like fruit puree or fruit juice).

Just watch out for using tropical fruits like pineapple, mango, kiwi because they contain an enzyme that causes the gelatin not to set. Otherwise you would have marshmallow fluff...

Vanilla Marshmallows

Cold Water 4 oz

Gelatin (powdered) 2 Tbsp

Water 4 oz

Corn Syrup 7-3/4 oz

Sugar 16-1/4 oz

Salt ¼ tsp

Vanilla 2 tsp

Need: Greased Brownie Pan, lined with plastic & greased again, Powdered Sugar for dusting, Ice Bath, Candy Thermometer

Directions

1. Thoroughly dissolve the gelatin in the cold water in the bowl of a standing mixer, fitted with whisk attachment.

2. Pour the water, corn syrup, sugar & salt into a saucepan fitted with a candy thermometer, in that order. Bring to a boil, without stirring, and then cook to 240 F. Take the pan off the burner. Leave the thermometer in the pan and shock the bottom of the pan in a bowl of ice water to stop it cooking. Allow the syrup to cool in the saucepan until the temperature is 210 F.

3. Pour the syrup over the bloomed gelatin in the mixer bowl. Begin mixing at medium speed. Once the marshmallow thickens, you may increase the mixer speed to high. Whip the mixture for 5 – 10 minutes, until the marshmallow is fluffy, very thick and still warm. By the time it is done, the mixer should be laboring. Pour in vanilla to taste and whisk until just combined.

4. Transfer the marshmallow to the lined, greased pan. Cover with a second piece of greased plastic wrap and press out to even the top. Allow to cure for several hours or even overnight.

5. Sift powdered sugar onto a cutting board. Remove the plastic wrap and flip the marshmallow slab onto the board. Sift sugar on the top.

6. Cut the marshmallows with scissors or a knife dipped in powdered sugar. Roll the cut edged in more powdered sugar. Store, in a container indefinitely.


Tuesday, April 7, 2009

Dots & Bows


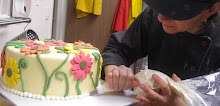
This was the weekend of dots & bows - fondant, that is. Here are a few pictures from this past weekend's cakes - I didn't get photos of all of them - plus we hosted a wedding reception here on Sunday (congratulations Jennifer & Ben!) - so their cake is in the lineup as well. Let's hear it for polka dots! They cover up and make things cute at the same time...

Blast From My Past

I just found a disc filled with pictures from my culinary school days. Not too long ago, but it still seems like a lifetime ago. My certificate program at the CIA in St. Helena started right after September 11, 2001 and we finished up by June 1st, 2002. Our class consisted of 17 students, who spent 7am - 2pm every weekday together. Sad to say, I have only kept track of 3 of them... So, we learned a lot, made tons of mistakes, and ate tons of good food! Here are some of the choices pics. People pictured are Tiffany, Fonda, Sara, Christopher, Rachel, Anne, Maria, Chef Jorin, Chika (@ the Tandoor), & the Scharffenberger factory tour (including Chef Durfee) ...


Thursday, March 26, 2009

AZ Breakfast Bowl with Jen's Kick-Ass Granola


Annie Z. told me about a breakfast she had in Arizona that involved multigrain hot cereal, brown sugar, yogurt, fruit, and granola. I had all of these things in my kitchen, I just never thought to put them together. It was pure genius -- so much more than the sum of its parts.I don't know if this is anything like the original, but my version kicks Cheerios' butt any day. Trust me; we've eaten this every day this week and we are still looking forward to more!

It doesn't really take a lot of time, just a little prior preparation.If you made the multigrain bread from last month, you'll have 7-grain hot cereal mix ready to go. Make that according to the instructions on the package. While that's cooking (either in the microwave or on the stove), get your fruit ready. Today I used a mix of frozen berries and fresh strawberries. Frozen berries are super convenient -- pour them into a bowl and microwave for a minute to thaw. Now, gather up the other toppings. I make my own yogurt and granola (kick-ass recipe below), but you can just buy yours. The only other thing you'll need is brown sugar or maple syrup, if you prefer.

Assembling:

1. Put your cooked cereal in the bowl.
2. Sprinkle some brown sugar to taste.
3. Scoop on some yogurt.
4. Pour on the berries.
5. Top with your favorite granola (make sure it kicks ass).

Enjoy!!

Jen's Kick-ass Granola Recipe
(makes 6 Cups)

1/2 C Vegetable Oil
1/2 C Maple Syrup or Honey
1 C Wheat Germ
1/2 t Salt
1 T Vanilla Extract
3 1/2 C Old-Fashioned Oats
1 1/2 C Chopped Nuts
2 C Dried Fruit

Preheat oven to 375°. Stir oil, syrup, germ, salt, and extract in large
bowl. Add oats and nuts, and stir some more. Spread mixture on a
baking sheet and bake for 15 minutes. Pull the sheet out, stir, then
bake until golden, about 10 minutes more. Pour mixture into large bowl,
mix in dried fruit, and let cool.

Thursday, March 19, 2009

Old School Swanky Petit Fours


So, to change it up a little, here's a completely different recipe - not bread, not practical, not humble. Kind of the exact opposite. Here's a recipe from my school days for those classic, old-fashioned sweet & dense Petit Fours. The procedure is pretty straight-forward, but the key is planning ahead.

Just to warn you, these babies aren't something you can whip up in an hour. The cake itself is moist & super almondy. Then, the cake gets split into 3 planks, which are they layered with your favorite jam. The key is to wrap the cake well in plastic, then weigh that baby down (smash it almost) with a heavy book or 2 and let it hang out in the freezer for 6 - 8 hours or more.

Once the cake is very cold and firm, then the pieces can be cut with either a knife (really measure them so they're very even!) or a cookie cutter. But before you do that, roll out a piece of marzipan and place that over the top of the cake stack. You do this so that the top surface of the petit fours come out very smooth & even.

The only tricky part is the glazing process. If any drip of glaze gets on one of the cakes you've already glazed, it will be visible. It's best to use more glaze than you think you'll need and just pour it carefully over the whole cake. The glaze can be reheated and reused so don't feel like you are wasting anything. After the glaze dries, you can pipe a design on top of each petit four with ganache or you can dip the base of each petit four in chocolate. Now you are all set for that Tea Party you've been meaning to have. Good luck!

Almond Petit Fours Glacé

Almond Paste 4 oz

Sliced Almonds 3 oz

Sugar 7 oz

Soft Butter 7 oz

Eggs 9 oz

Cake Flour 3 oz

Apricot or Raspberry Jam as needed

Need: One half-sheet pan, parchment paper, stand mixer with paddle

Directions:

Preheat the oven to 350 F. Line the sheet pan with parchment paper.

In the stand mixer, cream the almond paste and sliced almonds. The almonds will break up some in the process. Add the soft butter and mix together until smooth and somewhat fluffy.

Add the sugar and mix together until homogenous. While continuing to mix on medium low speed, add the eggs one by one.

Scrape down the mixer bowl and paddle and mix again to ensure the batter is smooth. Add the flour and mix just until combined.

Spread the batter into a lined sheet pan and bake until the cake golden brown and bounces back. Let the cake cool in the pan, and then flip out onto the back of another sheet pan lined with parchment. Cut the cake into 1/3’s long ways.

Take one 1/3 and spread with jam, in a smooth even coat. Place the next 1/3 on top and repeat the process. At the end you should have 3 layers of cake and 2 layers of jam. To continue, roll out a very thin piece of marzipan or fondant and place that on top of the cake. This will allow the top surface of the squares to be smooth.

Wrap the cake well and freeze for at least 60 minutes, or up to several days.

Then use a very sharp serrated knife and cut the cake sheet into 1 ½” squares or cut into another fun shape with a teeny cookie cutter.

Petit Fours Icing:
9 cups sifted confectioners’ sugar (about 2 pounds)
3/4 cup water
1/2 cup light corn syrup
1/2 teaspoon vanilla extract & 1/4 teaspoon almond extract

Combine ingredients in top of double boiler and heat over boiling water just to lukewarm (do not overheat icing or it will become dull). Remove from heat, leaving icing over hot water to keep it thin. If desired, tint parts of icing delicate pastel colors with food color. If necessary, add hot water, just a few drops at a time, until of pouring consistency.

Glaze cake pieces by placing upside down, a few at a time, on wire rack over large bowl or baking dish. Pour Petit Fours Icing over top so entire cake piece is covered at one time. Glaze that drips off cakes into bowl can be reheated and used again. Decorate tops with silver dragees, piped ganache or royal icing.